How Aircond Fault Diagnosis Works: A Transparent Look
How do technicians diagnose an aircond fault? We walk through the step-by-step process — tools used, what we check, and how we decide on the repair.
We often see homeowners struggling with recurring AC problems because someone treated the symptom instead of the root cause. It is incredibly frustrating when a unit stops cooling properly right in the middle of a Kuala Lumpur heatwave.
Our team knows that proper troubleshooting is the only dividing line between a permanent fix and a temporary patch.
A reliable repair starts with hard data instead of guesswork. We will break down exactly how professional aircond fault diagnosis works. This guide covers the specific tools required and the exact readings that tell us what is failing.
Why aircond fault diagnosis matters
Our process prioritizes accurate fault diagnosis because identical symptoms often hide completely different problems. A vague complaint like “not cooling” could stem from a blocked air filter, a failing capacitor, or a low charge of R32 refrigerant.
We frequently encounter units that were incorrectly diagnosed by previous technicians. Replacing a costly compressor is a massive waste of money if a simple RM 35 run capacitor was the actual culprit.
Our approach ensures that we find the root cause on the very first visit. Skipping this vital step guarantees that you will pay for another repair when the same issue returns.
- Paying for a replacement part while the original problem persists.
- Recharging refrigerant without performing a leak test to find the hole.
- Swapping out a perfectly functional compressor instead of checking the electrical supply.
- Ignoring a deeper wiring issue that eventually trips your main electrical breaker.
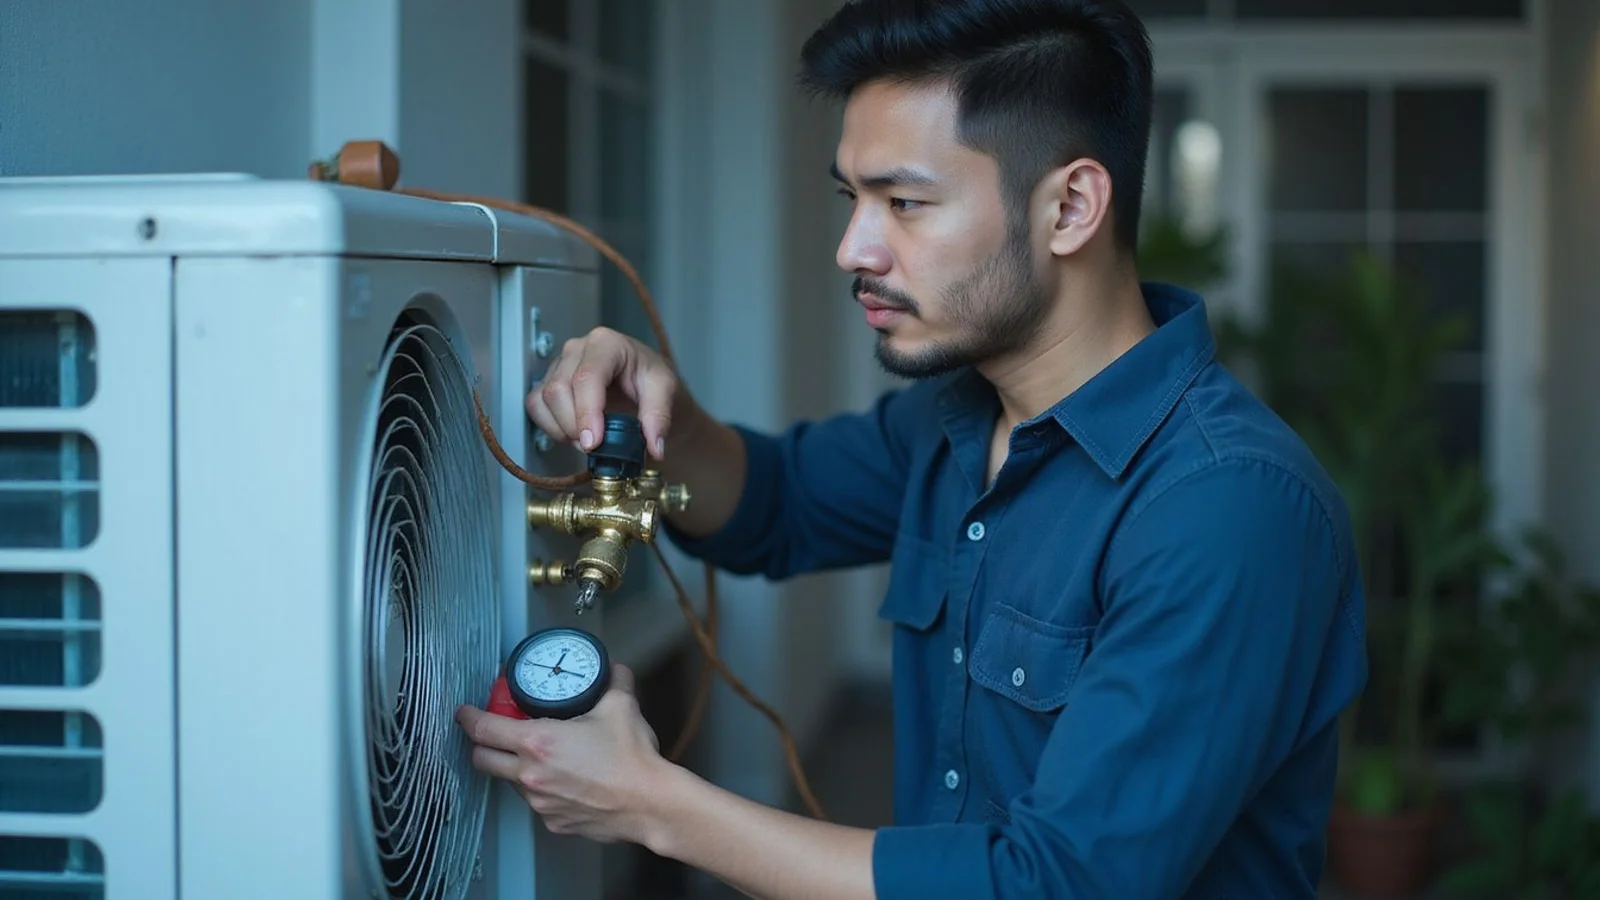
The tools we bring
We carry a specialized diagnostic kit to every single job site. Professional tools are non-negotiable for identifying complex electrical and mechanical faults safely. Our technicians rely on these precise instruments instead of guessing. Each tool provides verifiable data that guides the entire repair process.
| Diagnostic Tool | Primary Function | Specific Target Reading |
|---|---|---|
| Manifold gauge set | Measures R32 and R410A refrigerant pressure. | 110 to 150 PSI on the low side for modern R32 systems. |
| Digital Multimeter | Tests voltage, resistance, and capacitor health. | 240V AC supply voltage and 30uF to 50uF capacitance. |
| Clamp ammeter | Reads compressor current draw under load. | Roughly 4.5 Amps for a standard 1.0HP inverter unit. |
| Thermal sensor | Measures coil and supply air temperature delta. | A healthy temperature drop (Delta T) of 8°C to 10°C. |
| Insulation resistance tester | Finds internal shorts in wiring or compressor windings. | Resistance above 50 megohms for safe operation. |
The standard diagnostic flow
We follow a strict, eight-step sequence to eliminate variables during an aircond troubleshooting session. Consistent testing protocols prevent us from missing hidden issues.
1. Customer brief
We always start by listening to your specific experience with the unit. Power cuts or severe thunderstorms in the Klang Valley often trigger electrical surges that damage circuit boards.
Our team uses this context to narrow down the potential fault locations immediately. Small details save hours of unnecessary testing.
2. Visual inspection
We conduct a thorough physical check of both the indoor blower and the outdoor condenser. Routine visual sweeps identify obvious mechanical failures before we even touch a multimeter.
Our technicians look for several specific red flags during this phase. This step prevents us from overlooking glaring issues.
- Melted or chewed wiring from rodent damage.
- Severe dust buildup blocking the evaporator coil.
- Oil stains on copper pipes indicating a slow gas leak.
3. Power-on test
We power up the air conditioner to observe its initial startup sequence. The outdoor fan might spin while the compressor fails to engage.
Our technicians listen for abnormal humming sounds or relay clicks from the main board. Observing the unit in action points us toward the exact failing component.
4. Error code retrieval
We access the brand-specific service mode using the remote control to pull stored fault codes. This digital feedback is an incredible advantage in modern inverter systems.
Our database of codes allows us to translate these blink patterns instantly. Specific errors guide our physical testing process.
Common Error Codes: A Daikin unit showing a “U0” code specifically indicates a refrigerant shortage, while a Panasonic flashing an “H11” error signifies a communication failure between the indoor and outdoor boards.
5. Electrical checks
We test the core electrical components to verify they meet the manufacturer specifications. A standard 1.5HP unit capacitor should read exactly at its rated 35uF value.
Our multimeter readings will quickly expose a weak capacitor or a voltage drop from the main 240V supply. Faulty electronics cause a significant portion of all cooling failures.
6. Refrigerant pressure check
We connect a manifold gauge to the service valves to measure the exact operating pressure. Modern cooling systems must maintain precise pressures to absorb heat effectively.
Our technicians compare your actual readings against the factory design specifications. Low pressure definitively proves there is a leak somewhere in the copper piping.
| Refrigerant Type | Typical Low-Side Operating Pressure |
|---|---|
| R32 | 110 PSI to 150 PSI |
| R410A | 110 PSI to 150 PSI |
7. Temperature delta check
We measure the air temperature right at the intake and again at the cold air supply louver. A healthy air conditioner should produce a clear temperature difference.
Our thermal sensors confirm if the system is actually absorbing heat efficiently. Weak temperature drops indicate poor airflow or early stage compressor failure.
The Delta T Standard: We look for a temperature drop of 8°C to 10°C. If your room is 28°C, the air coming out of the louvers should be 18°C or colder.
8. Conclusion and quote
We sit down with you to explain the exact findings in plain, non-technical language. Transparency is vital before any physical repair work begins.
Our team provides a firm, itemized quote based on the specific data we gathered. You retain complete control over the final decision to proceed.
What “honest diagnosis” looks like
We insist that clear communication is the hallmark of a professional service call. Vague answers usually mean the technician is guessing with your money.
Our team provides specific data points to justify every single recommendation. Factual data allows you to make an informed choice about your repair investment.
| Data-Driven Diagnosis (What You Should Hear) | Guesswork (What You Should Not Hear) |
|---|---|
| “The capacitor reads 25uF but is rated for 35uF. Replacing it will cost RM 150." | "I will just replace the capacitor and compressor while I am here." |
| "Your low side pressure is only 50 PSI. We need to perform a leak test before adding gas." | "It probably needs gas. Let’s just top it up and see what happens." |
| "The system pulls 4.5 Amps, but the coil is clogged. It requires a chemical wash for RM 180." | "It is hard to say without taking the whole unit apart first.” |
When diagnosis takes longer
We can resolve most fault tracing within an hour, but certain situations require additional patience. Complex commercial setups naturally demand a more extended testing period.
Our technicians will always notify you if the process is going to exceed the standard timeframe. Clear expectations prevent surprises when dealing with tricky, hidden issues.
- Intermittent electrical faults: The air conditioner might only trip the breaker after running continuously for two hours.
- Thermal stabilization time: Accurately measuring the Delta T requires the room to cool for at least 45 minutes to reach a steady state.
- Deep-mounted access: Reaching the internal components of a concealed ceiling cassette or a multi-split VRF system takes significantly more labor.
What you can do to help
We value your help in speeding up the initial diagnostic phase. Preparation on your end allows us to arrive with the right replacement parts in hand.
Our technicians can begin testing immediately when the work area is clear. A few simple steps will drastically reduce your total service time by streamlining the aircond technician process.
- Locate the brand and exact model number on the indoor unit sticker so we can prepare the correct 35uF or 40uF capacitor.
- Record exactly when the unit stopped cooling or if any power outages occurred that day.
- Count the specific number of timer light blinks if the air conditioner shuts down automatically.
- Clear away furniture from beneath the indoor blower and ensure the outdoor condenser is accessible.
We follow this exact, data-driven sequence to protect your investment. Guesswork has absolutely no place in modern HVAC maintenance.
Our aircond repair team strictly adheres to this process on every single job.
Send a WhatsApp message to +60 14-302 9055 with your unit details and current symptoms to schedule a professional aircond fault diagnosis visit today.
Need this service done?
See our Aircond Repair & Diagnostics →